School year has been a bit more hectic than i initially expected. I recently contacted the company Musumi and obtained a sponsorship for my work on my Senior Design Project working on R2 voice control (CPU Arm mostly) Since most of this work has been paper work there is not much i can show my readers in terms of progress or pictures. Hopefully ill have some pictures of R2D2 for everyone soon!
~Jacob
Friday, September 19, 2014
Sunday, August 31, 2014
Marquette Senior Design
With the school year starting back up a group of seniors have come together to work on our senior design project. tying in with this R2D2 Project my team will be working on voice control and a pneumatic system which will be used for the CPU arm. In the mean time a few new members have been added to our group for this project. Our senior design project while not directly related to R2, will hopefully be modified and used internally at a later point in time.
Here is the new project group members
Jacob Osborne- Head of Project- Mechatronics
Nate Zastrow-Mechanical Engineer
Andrew Peterson-Mechanical Engineer
Randy Neu- Electrical Engineer
Marcus Evans- Biocomputing
~Jacob
Here is the new project group members
Jacob Osborne- Head of Project- Mechatronics
Nate Zastrow-Mechanical Engineer
Andrew Peterson-Mechanical Engineer
Randy Neu- Electrical Engineer
Marcus Evans- Biocomputing
 |
| Team Photo from left to right Nate, Andrew, Jacob, Randy, Marcus |
~Jacob
Friday, August 15, 2014
Door Skin for R2D2
The last part of the skins are being attached and drying as I speak. With the school year starting back up, project updates will be more scarce due to allocation of time. Updates will consist of lists of smaller things that have been accomplished since any previous updates and will not go as in depth.
~Jacob
~Jacob
Tuesday, July 29, 2014
Expense Chart Updated
after a long time of putting it off, the expense chart has been updated and added in through a google sheets document. As of right now $1400 has been spent on R2D2 however around some of this was parent donations as well as items that are being used for other things alongside R2D2. You can find the link to the expense chart at the bottom of the main screen of this blog.
~Jacob
~Jacob
Sunday, July 27, 2014
Senior Design
After talking with my professor for Senior Design, my work on R2D2 has been approved. I will be able to form a small team in order to work on two subsystems that will work inside of R2. This projects as of now include a voice control system (being modified from the hasbro toy) and a pneumatic system that will run the CPU arm and the light saber launcher from the dome. As for the rest of the the R2D2 i will continue to work on it with help from my friend Nate during our spare time.
~Jacob
~Jacob
Saturday, July 26, 2014
Painting Some Parts
Took some time this week to carefully paint some of the painted CAD parts and give them the blue detailing. using the same Ford Blue spray paint i sprayed the paint in a small cup and use a paint brush to carefully apply the paint to the necessary areas. A few weeks ago i took a sample part and attempted to color match the paint at a few local hardware stores but did not have any success. The parts ended up turning out very nice and will look good on the finished frame. The utility arms needed a second coat of paint after the blue spray paint ran out half way through the first coat some time ago. Also the new front vents received a few coats of the the silver paint and are ready to be added back into the skins.
~Jacob
 |
| Finished Utility Arms |
 |
| Painted Coin Slot |
 |
| Painted Pocket Vents |
 |
| Painted Power Coupling and Ankle Details |
 |
| Painted Side Vents |
 |
| Painted Front Upper and Lower Vents |
~Jacob
Saturday, July 19, 2014
Sanding With A Working Dremel
Now that we have a working rotary tool we are able to get the final touches on a few different parts. Through out this week i was able to do some sanding on the legs in order to get the layers of wood and flush as possible. During the original manufacturing process there were a few areas that once lined up did not match the rest of the legs. Due to tracing and then cutting out the legs with a vertical band-saw the tolerances were less than adequate... With this issue now fixed the legs can no be "skined" with styrene similar to what was done with the frame.
 |
| Finished Legs |
 |
| Fixed Area of Legs |
~Jacob
Friday, July 4, 2014
Fourth of July
Got a chance to go to a few hardware stores today. Picked up my dome bumps at Lowes as well as some rotary tool accessories and some new tips so that the rotary tool can be used again. Just as a recap the tip inside the rotary tool that i bought earlier this year was to small for any standard bits. Now that we have the rotary tool up and running again we can finish off the dome and touch up on multiple areas of our droid!
~Jacob
~Jacob
Friday, June 27, 2014
New CAD Parts and Skins Attached
just a quick update our CAD parts we sent off as a work order in the machine shop finally were completed. The front vents were remade due to the makerbot making poor quality prints and under sizing of the vents to the point where they did not fit properly. Throughout this week the back skins were slowly attached to avoid any mistakes. Again we ran into a small problem where the original skins where slightly shifted when they were drying in place which caused the new skins to do the same. This issue was fixed with a little sanding and eventually will be fully fixed when a new CAD piece will be inserted.
~Jacob
~Jacob
 |
| Front Vents and Octagon Port |
Cleaning up the skins
not much was done this week. With my family coming up to visit all the was able to get done was a little bit of cleaning by Nate and myself. Taking some nail polish remover and some q-tips the skins where thoroughly cleaned from any surface defects that might have occured
~Jacob
~Jacob
Friday, June 20, 2014
Fixing Things Up
After our mistake with the skins some time was spend re-positioning the door on the frame in order to fit the skins correctly. Along with this more sanding work was done to keep the skins flush to the wood. The issue with the gas pipe assembly being off center is still present, however a feel ideas have been jotted down to fix this issue.
~Jacob
 |
| Dry fit skin test (hole is off center) |
Door test fitting
Monday, June 9, 2014
Ran into a few more problems
well with the quick meeting today we were meant to attach the second half of the skins. as we dry fit the skins to R2D2, we noticed that the holes that were previously drilled for the gas pipe are not perfectly center between the two parts of the circle. It turns out the original skins were slightly shifted during the drying phase, making the hole not center. This is a fairly big issue due to the unbalanced rotation as r2d2 switches between 2 and 3 legs. On another note we found out we installed the door wrong, matching it up with the top of the frame, when it should have been matched up with the bottom. Just to make sure the door will be sanded and moved to make sure the skins fit perfectly. The good part is, it is all a learning experience and it is an opportunity to learn from our mistakes.
~Jacob
~Jacob
Wednesday, June 4, 2014
Post Vacation Meeting
Meeting #:
June 4th 2014
Attendance: Jacob
Length: 120 Minutes
Since i got back into town today after a little vacation of makers faire and visiting the family, I decided to come into the shop today to work a little bit on R2D2. First thing i did is checked to see if those CAD parts that i sent in during finals week were done, the order got misplaced so unfortunately i will be waiting a bit longer for those. The staff is also cleaning out all of the storage spaces so there is not as much room to work today. What i did manage to accomplish though is drill 2 holes in the utility arms, getting some 3/16th in metal dowels and drilling 1 of the 2 holes in the side of R2D2 for the gas pipe for the legs. Again i ran into a problem where the hole saw that i was going to use for the gas pipe is a bit to big for the power drills that we have. I will probably end up using a spade bit to get the correct size hole needed tomorrow.
~Jacob
 |
| 1 1/8th in hole saw, have a flange to install for 1 1/16th pipe |
 |
| 3/16th in shaft on utility arm, good press fit. |
Monday, May 19, 2014
Makers Faire
Just wanted to give everyone a quick update about our trip to Makers Faire in California this past weekend. Both myself and Nate flew out and spend a few days at a near Marriott (about a mile away) while we went to Makers Faire. This was both our first experience at a Makers Faire and we both had one hell of a time! not only were we able to talk to a few builders from the Astromech group and pick up an idea but we were able to see many wonderful projects that other builders have made. It is really inspiring to see this finished products and knowing how much time that goes into them. Being able to heard a really inspiration talk by Adam Savage in personal is probably one of my most memorable moments there.
~Jacob
 |
| Adam Savage |
 |
| Astromech R2D2 Builders Club |
Sunday, May 4, 2014
Finals Week and Updates
May 4th 2014
Attendance: Jacob
Length: Multiple Days, No Set Length
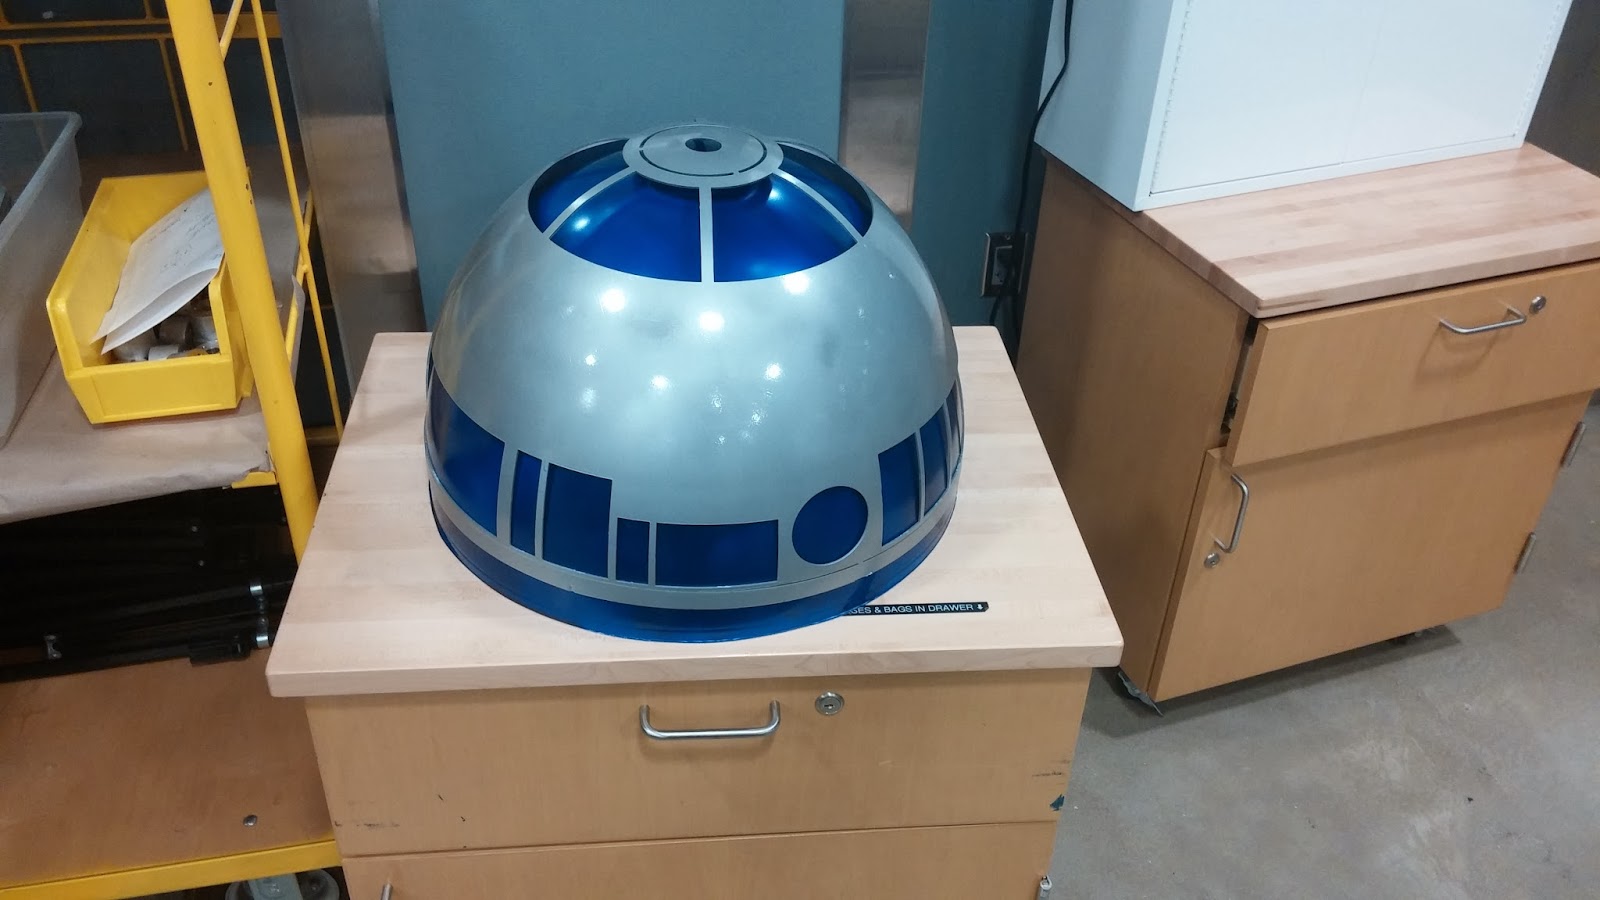
During some free time during finals week and a good portion of the week after finals a bit of work has been done on r2d2. some test fitting of parts inside the styrene skins, a lot of detail work of applying jb weld to the inner seams of the styrene skins as well as a lot of clean up work taking some acetone and getting rid of any unwanted mess that might have got on r2d2's skins (some jb weld) the 2 should hubs got a coat of primer as well before being painted there natural silver color later on. On another note, being probably one of the last builders to realize this the couple parts that are on thingverse are not to dimension. i send in a work order for some new redone CAD pieces to get printed, will update with new pictures when available.
on another note we will be at the California bay area makers fair coming up May 17th and 18th. Hopefully this will give us a good opportunity to talk to other builders and gets some tips on building our r2d2.
 |
| Frame test fitting coin slot and power coupling |
 |
| primed shoulder hubs |
 |
| JB weld on inner seams for more support |
Friday, April 18, 2014
Good Friday Meeting
Meeting # Who knows
April 18th 2014
Duration: 9:00AM-3:30PM
Attendance: Jacob, Nate
Happy belated Easter! Had a very productive Good Friday. Started off with a trip to Walmart to pick up some groceries and supplies. Notable tasks were complete during this meeting: -Fixing, re-gluing the skin to the frame. -Second coat of paint on silver layer of helmet. -Heat treated silver layer of helmet to fit onto the bottom, blue layer. -Almost completely constructed the leg assemblies. -Fixed door to fix into body. We still have a lot left to do, but hopefully we can have another productive meeting soon and be able to have something to show to Marquette on Star Wars Day (May 4th). ~Nate
 |
| Cad Parts Painted |
 |
| Underdome with cut out marks |
 |
| shoulder hubs |
 |
| Dome Ring |
 |
| Leg 2 |
 |
| Leg 1 |
 |
| Fixing top corners of skins |
Skirt
Meeting #:

Attendance: Jacob, Bob
Time: 9:00AM-10:30AM
Date: 04/18/2014
just a short friday meeting between classes. we took some time to add a few staples with a staple gun to help hold on the skins as we touch up on a few spots. also we attached the skirt using some countersunk screws and glue.
Wednesday, April 9, 2014
Quick Check Up on Glue
Well after 3 days of drying time for the wood glue i decided to check on the skins to see if they would stay attached. Unfortunately the small end pieces near the location of the shoulder hubs came off. Spend some time re gluing those locations and will let it dry until our next meeting on April 16th.
~Jacob
Sunday, April 6, 2014
Weekend Meeting
Meeting # Who knows
April 5th 2014
Duration: 9:00AM-4:00PM
Attendance: Jacob, Nate
got a lot of work done today. Starting out with a quick run to home depot with Nate we were able to pick up another sheet of 1/2" birch plywood to attempt to finish off the legs as well as some paints and misc. hardware for the legs.
a few notable things that got done this meeting
* Outer and Inner most parts of legs machined
* Inner square for legs glued
* Should hubs machined and glued together (made them 1" by using two 1/2" pieces instead of 3/4" due to not wanting to spend another $20 on a sheet of birch wood.)
* Skins cut out, sanded and test fit our 3d parts in some places
*Front Skins Attached for now (became a much bigger mess that i thought it would)
As for the skins i am very happy i did not attach the back skins yet because i realized i was jumping the gun and still need to drill my home for the pipe to fit through the body of R2.
~Jacob
 |
| Glue we used to attach skins |
 |
| Dome Ring made from 1/2" birch in progress |
 |
| Shoulders gluing in place. |
 |
| Inner part of leg glued into place |
 |
| Skins being cut out by Nate |
 |
| Make shift way to attach skins and hold them in place |
Friday, April 4, 2014
Marquette University
Well after some shocking news... we were asked to post the link to our groups blog on the Marquette University website. With our incoming traffic almost tripled at this point i am hoping that this project will inspire other Marquette students to go out and take on their own personal projects and use what they learn in their engineering classes in a fun and creative way.
GO MARQUETTE!
~Jacob
GO MARQUETTE!
~Jacob
Quick Updates
Just wanted to give everyone a quick update on what has been going on since the last update.
* Door was made and inserted into the wooden frame (a few fixes from spring break update).
* Rocklet bearing was installed properly and hardware switched out.
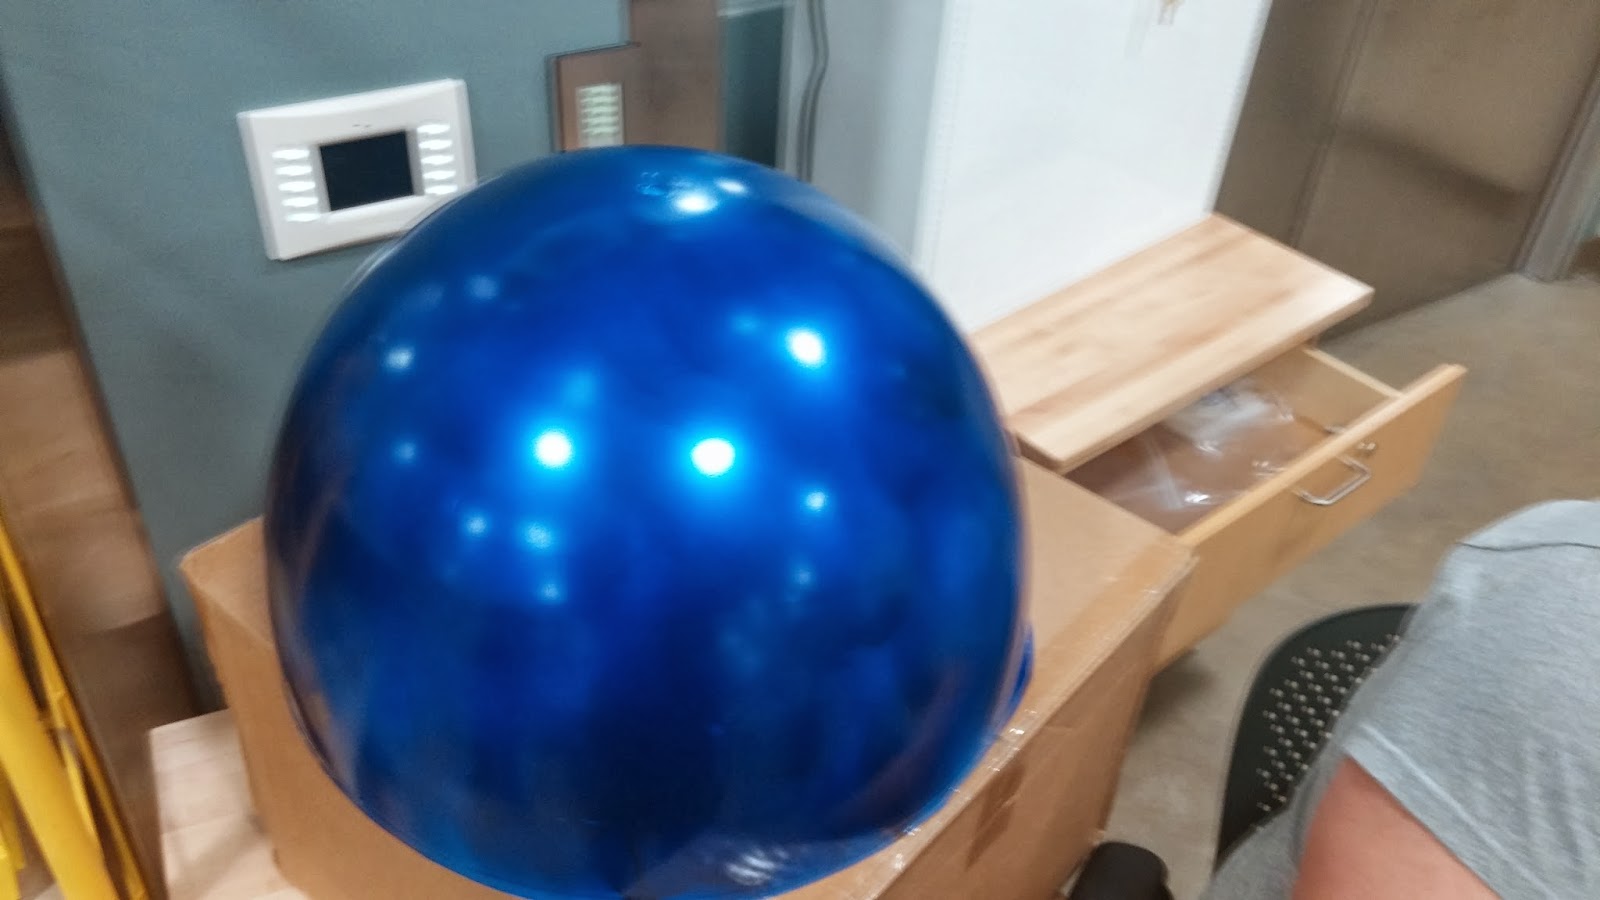
* Outer dome was sanded down in an attempt to fix the painting mistake from earlier.
* Realized i bought the wrong type of glue to attach the skins/skirt to the frame.
* Preformed some tests with different types of glue to find out what would work best.
pictures to come soon!
~Jacob
* Door was made and inserted into the wooden frame (a few fixes from spring break update).
* Rocklet bearing was installed properly and hardware switched out.
* Outer dome was sanded down in an attempt to fix the painting mistake from earlier.
* Realized i bought the wrong type of glue to attach the skins/skirt to the frame.
* Preformed some tests with different types of glue to find out what would work best.
pictures to come soon!
~Jacob
Friday, March 14, 2014
Over Spring Break
Dates: March 10th-14th (8:00AM-6:00PM Daily)
I have been putting a lot of hours into the project over our spring break. Over the past 5 days i have put close to 40 hours into working with r2d2. Some of the most notable progress was installing the back door or r2, finishing off the legs and prepping them to be skinned with styrene, taking the gas pipe to the lathe to make sure both pieces fit together as well as counter sinking the dome (that i did not do earlier) and finally finishing off that piece. Phew...
~Jacob
 |
| Gas pipes fitted in one another |
 |
| Frame with door added in |
 |
| gas pipes seperated |
Wednesday, March 5, 2014
Help me Obi Wan Kenobi...
We have just received our AAXA P4 P4X Pico Projector for R2. Our goal is to try a few mock holograms using a projector and smoke as well as have a little extra entertainment feature for our friends. At 95 lumens this is a fairly decent projector for a price of only 280$. It also has the added benefit of acting as our sound system within r2, able to hook up to external speakers and has multiple different waves to display media (HDMI, VGA, internal SD card, USB 3.0) etc. Really looking forward to seeing how this gets used inside the dome.
~Jacob
Saturday, February 8, 2014
A Lot of Work Done!
After finally being able to get our group together all at once for a meeting we actually got a lot of work done for once. Fixing a few spots on the top dome, painting the first coat of pain on the under dome, cutting off all the little tabs from the top dome as well as cutting out the pieces needed for the first leg! Thanks to bob taking the time to paint and Nate helping with the mechanical aspects of this meeting, this was by-far the post productive 120 minutes we have spent.
~Jacob
~Jacob
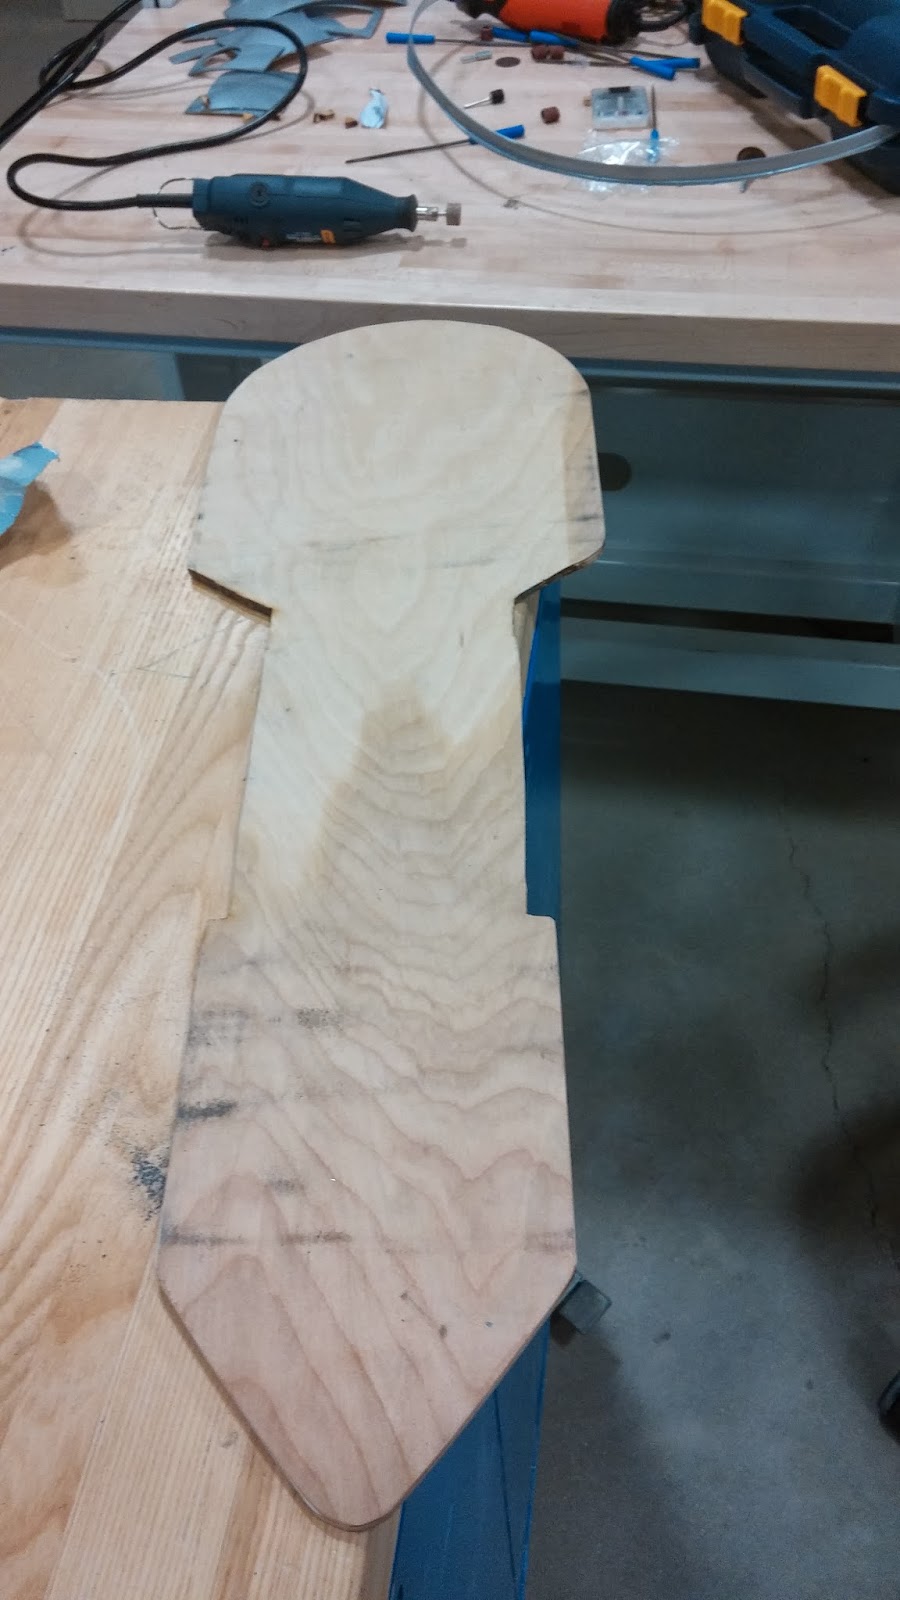 |
| Leg Template out of 1/4" birch |
 |
| Painted Underdome |
 |
| Un-Heatfitted Domes |
Friday, January 31, 2014
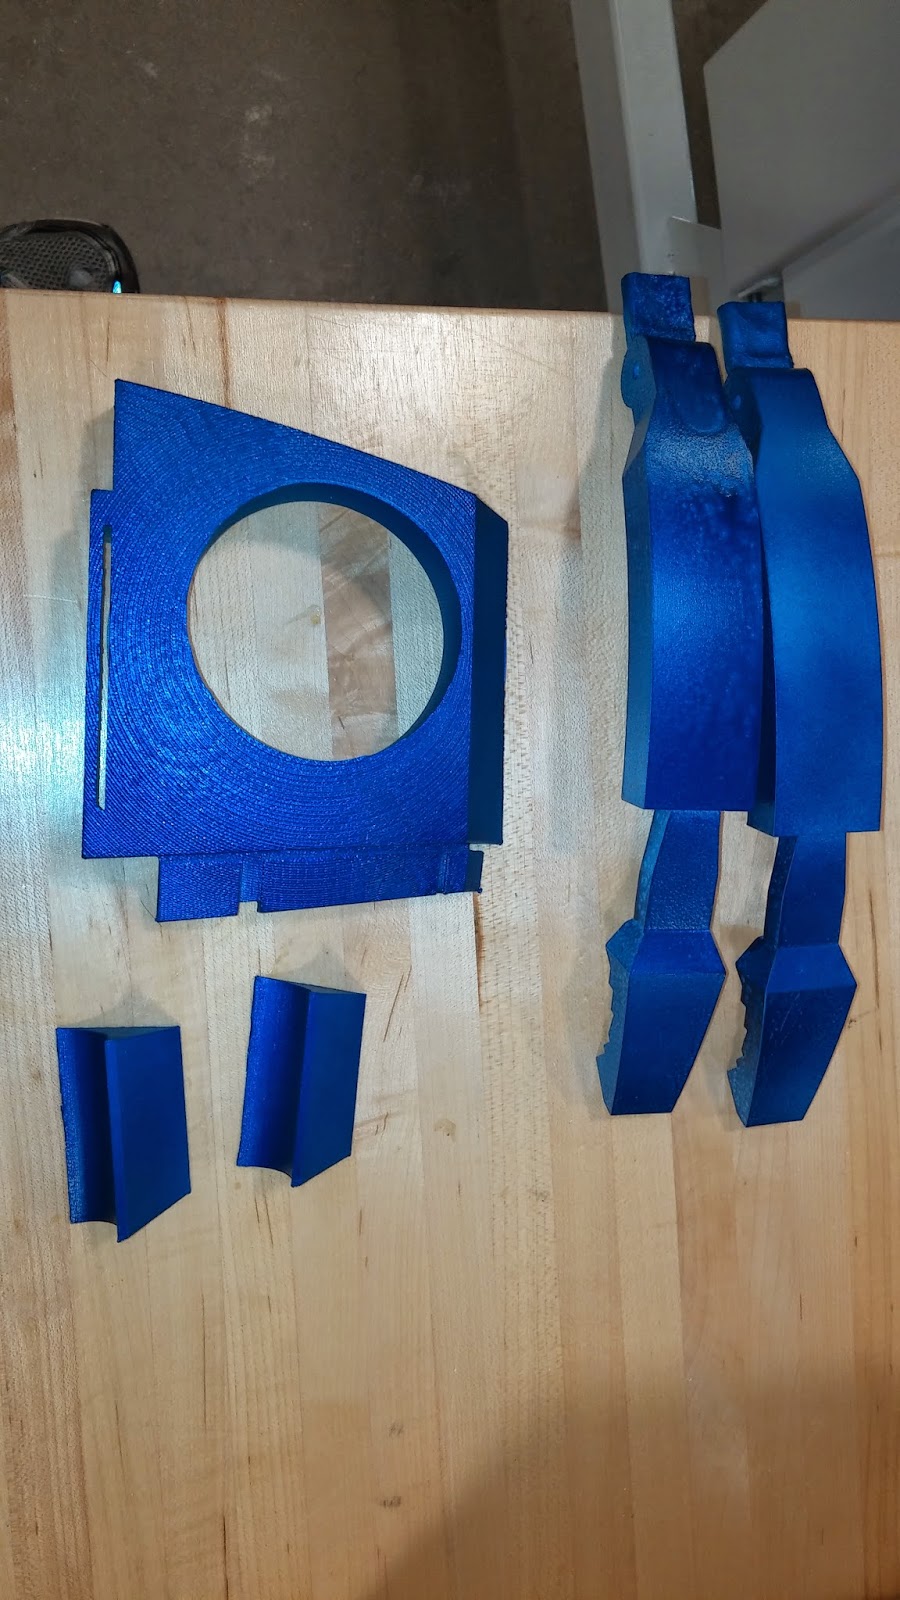
3D Printed Parts
The last of my 3D printed parts have been finished today, while some still needed some time to dry from the chemical bath they just underwent a few were ready for the painting process. Using a bit of spare time i had between classes with some help from my friend Bob Chayer we were able to get the first coat of silver paint on many of the pieces.
~Jacob
Here are the painted parts after the first coat of paint


Here are the unpainted parts


~Jacob
Here are the painted parts after the first coat of paint
Here are the unpainted parts
Subscribe to:
Posts (Atom)